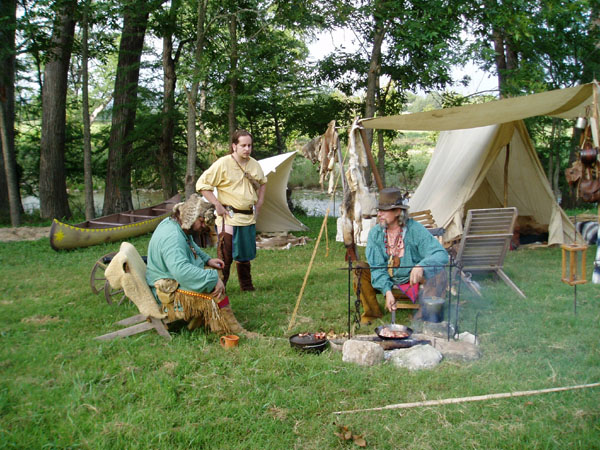
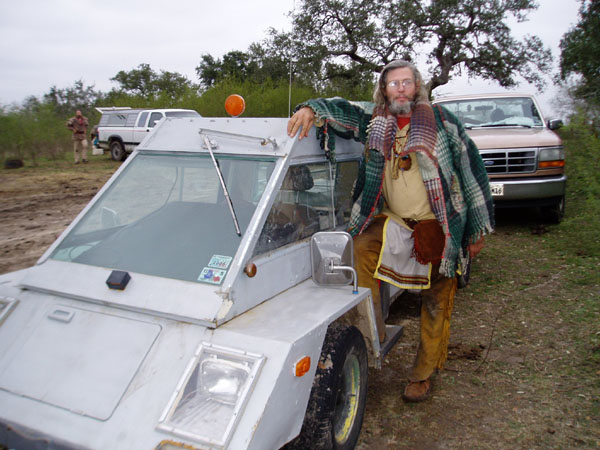
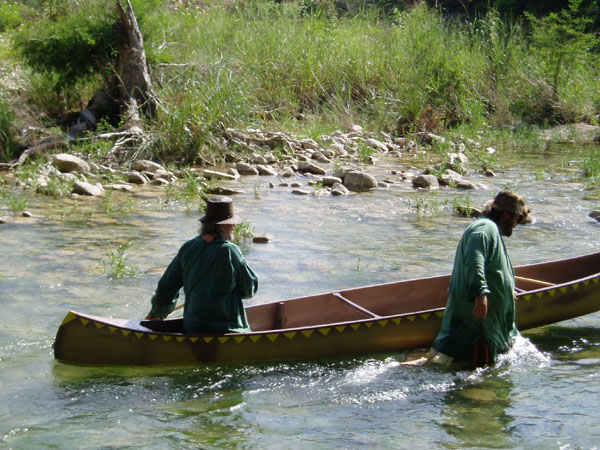
Texas Free Trappers – Rendezvous VIII Report

Friends of TFT,

We thank you for taking part in our eighth rendezvous, the fourth one at the La Vernia site.

The event is growing, mostly due to your helping us to get the word out about the quality of the event and the beautiful site that a generous landowner allows us to use.

Previous participants will notice that we are constantly improving the facilities and targets. At Rendezvous IX we plan to have installed at least 12 knife and hawk blocks for a separate knife and hawk walk near the present blocks. There will be no pacing off of throwing distances allowed. We will advise that when a competitor walks to the block to retrieve his or her weapon a straight path should not be taken to and from the target block. This is to prevent fellow throwers from counting the steps to the block and gaining an advantage.

We plan to buy 3D archery targets so we can have an archery walk in addition to the matches we now have. However, they are so expensive it will probably not be in the near future. The catalogs I have seen have small game targets starting at around $100. We appreciate “Catfish” Jackson’s loan of his 3D deer.

At Council Fire the informal “vote” to increase registration fees for competitors in order to increase the number of prizes was noted. TFT members will discuss a new approach to awards, keeping the black powder prizes as a basis with options for less valuable prizes. Everyone should appreciate the current retail price of powder, though we buy it in quantity. Current retail price is around $20 per pound. In order to encourage Cuz to continue coming to rendezvous we will consider optional “Trader Bucks” that can be exchanged for his merchandise, probably in $5 and $10 denominations.

Would any ‘skinners be interested in a raffle for a valuable print or book on a fur trade subject?

Until interest and participation increase we will hold Round Robin trading separate from Council Fire activities. Now that you have seen how it works maybe you will come up with an object that you would part with in a trade for an equally priceless historic item.

I’m sure that everyone enjoyed the program that the Living Waters Drum did for us. The members said that they enjoyed being there and would return for Rendezvous IX….and would bring some traditional dancers. This is something I have been trying to do ever since my Taos Free Trappers rendezvous days in New Mexico, 1990-1999. We thank Jacob Nishimura and Jimmy Gonzales, two friends from San Antonio Living History Assn. and fellow reenactors of the battles for Texas Independence, for inviting the Drum and for demonstrating Lipan Apache and Plains Indian dances.

Many thanks are due to Cold Bear and Herb for preparing the meat for potluck supper. They also mow the site a few weeks before each rendezvous and pitch in at our pre-event work days. They do these things for nothing but the love of rendezvous and the many friendships they have formed.

The tentative dates for Rendezvous IX are November 21-23, with early setup day on the 20th. That’s the weekend before Thanksgiving.

One of my hopes is to bring to Council Fire a sharing of knowledge of the era of the fur trade. It is a subject that is almost totally ignored in our schools. The American Revolution gets decent coverage, the War of 1812 a tiny bit, the Lewis & Clark Voyage of Discovery gets some mention because of the passing accent on its 200th anniversary, then history skips to the Civil War. Texas schoolchildren get a small bite of the story of the struggle for creating the Republic of Texas and nothing of the War with Mexico to keep the entire southwestern United States. I have asked TFT members to study the characters of the fur trade and try to bring them to life at Council Fire. I encourage you skinners to do the same. I was inspired by a member of a club in New Mexico who talked for a few minutes about history at its semiannual rendezvous. He would pick a year between 1820 and 1840 and talk about what was happening in the US and the rest of the world that affected our nation. I am an enthusiastic fan of “painless history” that comes through living history reenacting.

Nitty gritty facts:

We don’t do rendezvous for the money, but try to cover expenses.
TFT members (there are 11 of us) do almost all of the work. 7 of us were at R VIII.
Non-member volunteers are welcomed.
Income from R VIII registrations was $230.
Expenses were 14 lbs BP – $168, retrieval rope for flying turkey target – $16, landscape timbers for hawk blocks and future hawk walk – $26, toilet paper for Taj Mahooter – $13, copying of scoresheets, etc. – $17 – total $240

Lost & Found:

Sony camera lens cap
stainless steel cup
stainless steel ladle
linked pair of ¼” x 9” bungee cords

Your thoughts and constructive suggestions are welcome; write, email or call me.

We look forward to seeing many of you at Fritztown Free Trappers Rendezvous in October.

Watch your back trail……………

– From Grey Wolf, 8 June, 2008

Stolen BP Guns – Ennis, TX

I received this from Liz and Ken of Ennis, TX. Keep your eyes open!
Our home was robbed Thursday, May 22 and they took all our guns, including black powder ones. While some of them are common, a couple are pretty rare. Those of you in the North Texas area will notice that Canton trade days is coming up next weekend. Here’s the black powder stuff they took, damn their hearts and curse their souls.

Navy Arms 12-gauge double barrel shotgun, black powder

Thompson Center Firearms Co.
.45 cal Cherokee rifle
.45 cal Seneca rifle
.45 cal Patriot pistol
.50 cal Hawkins rifle
.52 cal Renegade with Leopold scope
.58 cal Renegade with Green Mountain barrel

Ken and Liz Moucka Krajca

The White Smoke Brigade’s Match 46

April 12th at 10:00 am

Minimum of 3 rifle matches and 1 single shot pistol match

Let’s try again for a revolver match

At our range site on the west side of FM 306 – just south of Purgatory Rd

The new backstops are in place!

Look for the WSB sign by the gate

Bring your single shot pistols & revolvers

For more details contact Grey Wolf at wolfbear@gvtc.com

Fire Safety Tips

With the three tents burning up at the SW, I thought it might be time for a little discussion on fire safety, and picking y’all’s brains for ideas to keep us all safe. I have been coming to ‘voos for nearly 6 years now, and have (knock on wood) never seen a tent fire till now. But I think all of us at the SW were conscious of how much we take for granted after that experience, and how lucky we all may have been before now. At the AMM doin’s in January up in Linden, we had a spark jump the logs in our camp while we were all at the meeting and camp feed, but thankfully the neighbors woke up from a nap in their tent to go pee, and saw the grass afire and beat it out. It came within literally two inches of our diamond fly before they got it out

So, here’s some fire safety tips for us Rendezvous-ers, gleaned from recent experience at the Southwestern, and other advice – please reply with additions to the list!:

1. Rules of most ‘voos say you MUST have a fire extinguisher (A-B-C type is the one you need) and/or a two-gallon bucket of water near the fire at all times. DO IT. Booshways and dog soldiers, please enforce it. This isn’t an arbitrary nit-picky rule, it could save your own life and your neighbors’.

2. Good idea to keep a burlap tow-sack or a piece of other strong cloth/blanket near that bucket, to wet the cloth/sack and slap out grass fires and early canvas fires. It is very effective and doesn’t use up as much water as throwing it on the fire.

3. A thick wool blanket thrown over a fire will often smother it, they say.

4. Do not throw water on a grease fire in a skillet. A CLUMP of flour (not a thin scattering of flour, it will burn too) will smother it, so will putting a lid on it(safer), or using baking soda (but it takes a LOT of baking soda). Easiest is to find a lid (not glass, it will break. Do not try to carry the grease outside, you will get burned and drop it. Find a lid, tin plate, etc, and put it on it.

5. Better to make a canvas PC cover (labeled fire) for the fire extinguisher and keep it out, than in the tent or under canvas where it is hard to find.

6. If your tent has BLACK POWDER in it and it is on fire, let someone know! That way they don’t get killed going in there when it blows up.

7. Ladies, be careful with those long skirts on and long loose sleeves, around the fire. Burning to death was a common cause of death among pioneer women. Stop, drop and roll.

8. Some of us geezers/city-slickers need/want heat in the tent at night. Some bring propane and keep it out of sight. As evidenced at the SW, this can go awry, but so can an open fire. Be careful with any source of heat in the tent or tipi. Leave the flap cracked a little to let in oxygen if you are burning propane, especially if you are sleeping on the ground – propane is heavier than air. Some propane heaters will cut off if the CO2 level gets too high, and we have never had a problem with John’s, but a battery operated CO2 detector in the tent on the floor, might not be a bad idea. Propane safety info:
http://www.gasco-propane.com/Files/safety.html

9. “Fire-retardant” does NOT mean “fire-proof”. ANY canvas will burn. Fire retardant means that probably a stray spark will not be enough to catch it on fire, but a steady flame source will ignite it every time.

10. wood vs. metal candle lanterns – we all love the ambiance of candle lanterns at a ‘voo, but we have all seen the wood-framed ones catch on fire or nearly do so if the candle tips against the wood. Keep those outside the tent, and maybe think about getting a metal/tin-framed one to use inside. Be careful with that one too, if it tips over and the glass shatters, fire gets out of that one too.

11. Do not leave a fire unguarded. If you are leaving camp and have something cooking, ask your neighbor to come over and watch it. Better yet, stay in camp. Bank the fire at night or any time you leave camp, with dirt or thick ashes, so it doesn’t flare up again and get out of hand. Of course, dig the usual fire pit and keep some logs around it too to contain sparks. Rake/hoe/dig the dry grass away from the fire area for a couple-three feet.

12. One guy said he taught his kids to sleep with their knives ON THEM, to cut their way out of a tent in an emergency (fire, grizzly attack, etc.). At least put it in the same place every night, within easy reach – like under the pillow, or right by the center pole next to the flashlight and hooter bag. If you had been in that tipi when the grass fire hit the only door, what would you do? I doubt if you could pull up the stakes and wriggle out under a tight canvas in time. A knife makes a handy “back door” anywhere you need it.

13. When there is a fire, yell “FIRE”. You may think, “well, DUH!”, but in a panic folks often yell other things that are not as effective. The Cajun guy yelled “help me”, other folks at Bugs’ fire yelled “bring water”. Yell “FIRE” as loud as you can and repeatedly in all directions – that word alone tells folks what to do, and will wake them up. Designate someone to keep yelling “fire” to summon more help as you fight the fire. Maybe that is why Cuz and John and I slept through the first two fires, we thought it was just rowdy-camp noise from 40 feet away. I mean I was asleep, they probably did yell “fire”, but I didn’t hear it.

14. Booshways and future booshways, make sure you tell folks at the ‘voo what county you are in so the campers will know what to tell 911 operators if they have to call out on a cell phone in an emergency. Tell or show the local EMS and firefighters and county sheriff how to find your remote campsite, before the ‘voo. That will save time and possibly lives in an emergency situation.

15. Cigarette butts should never hit the ground at a ‘voo (or anywhere else, for that matter). Do not flick your ashes onto dry grass or the hay-covered floor of a saloon or tent. Put it out safely and put it in the fire pit, or put it in your pocket to carry home to your trash. Spit on that ciggie-butt and make sure it is drowned out before putting it in MY trash, or I’ll kick YOUR butt.

I am repeating the part about grass fire speed from the last email, in case you didn’t have the patience to get through that long-winded one and read about it:
“Funny thing is, as I was driving home from the SW ‘voo there was someone on the radio talking about fire danger and how fast a grass fire can move. He said it can burn along at 4 miles an hour. Now that may not sound too fast, but if you do the math, that is one mile of country in 15 minutes, so…(5280 feet divided by 15 minutes is 352 feet per minute – yikes!) that means a grass fire fueled by a high wind and dry grass CAN BURN AN AREA THE LENGTH OF A FOOTBALL FIELD IN LESS THAN A MINUTE. LESS. THAN. A. MINUTE. That’s about SIX FEET PER SECOND. That is why George’s tipi burned – only took a SECOND or two for that fire to jump the 8 feet or so to the canvas, even with him carefully watching and only 20 feet away. FIRE IS OUR FRIEND BUT IT IS A DANGEROUS BEDFELLOW…”

Dry leaves and pine needles burn just as fast as grass, and yaupon burns like Kleenex also. Yaupon and other brush and low branches makes a nice “fire ladder” up into the tree canopy in a forest, and it the fire gets up in that pine/cedar canopy, you and all your neighbors are literally toast unless you call 911 and get bulldozers in there to clear a firebreak and let fire trucks in to it, to stop it. I helped save my friend Paul St. Louis’s house from a forest fire in the pine woods north of Bastrop one time, and it gave me a serious respect for fire. All I had experienced up to that time, were grass fires, but that big bad boy made a grass fire look like a birthday candle by comparison!

So anyway, I ain’t trying to make anybody paranoid, just trying to keep my friends safe! I am by no means an expert on fire safety either, so please reply with any corrections or helpful hints/additions to this list, so we can all be safe and relax and have a good time, knowing we have taken all reasonable precautions. After we get a few more good suggeations, hints, and advice, let’s pass this on to other ‘voo groups, so we can all be aware and safe. Yeah, I know I used “safe” a lot in this last paragraph, but I mean it!

Contributed by Patsy “Magpie” Harper

Southwestern report – 3 tent fires

Short story: 3 tents burn in one day, nobody seriously hurt. Two tents belonged to Cajun Johnny, & Bugs and Linda, and the tipi was George Wilburn’s.

Long story: (scroll down for fire details)

I have some pics of the SW, including fire-damage, up on my Photobucket website here:
http://s6.photobucket.com/albums/y208/soquili/Southwestern%202008/
click on the box at left on that page for pics of the buffalo skinning demo in another folder, or use this link:
http://s6.photobucket.com/albums/y208/soquili/Southwestern%202008/
Buffalo%20skinning%20demo%20SW%202008/

Um, if you are squeamish or the sight of blood bothers you, or you are a vegetarian, better not go to that second link!LOL It’s for carnivores only…

Other than the fire thing, we had a good time at the SW! Cuz and John went up on Thursday and ran into snow around Dennison, last 3 hours were 20 miles an hour in 4-wheel drive in a blizzardy near-white-out, pulling the ‘voo trailer. So they grabbed a motel room in Atoka for the night and drove out on Friday morning and set up then. Muddy conditions at the site due to the melted snow, but it had good grass cover so it was ok except for the road in.

I got there late Friday (had 20-mile-an-hour driving too for a while as I hit Dallas at 5:00 on a Friday – LOL) and promptly got stuck but had sense enough to shut the car off and not spin the wheels and wait till the next day to get out. It froze during the night and the road in was easier after that.

Camp was in a beautiful valley with some seeps and springs in the middle. Camp wound up being kind of strung out, as folks camped along the road going in, due to wet conditions the first weekend. Long-term was on the right end going in, traders strung out along the middle and around the camp meeting place, and rowdy camp and short-term on the left side. So ya got yer exercise wandering from one end to the other!

John Billington got hisself a fancy new pony for this one, a red 4-wheeled electric scooter, so he got to go “cruisin’ and perusin'” any time he felt like it! Said it was like being let out of jail, he didn’t realize how much he missed that freedom since he had to go on oxygen and be tied down. I tried to talk him and Iron Hand into a race with their scooters, but they wouldn’t do it! Iron Hand’s scooter had 3 wheels, so my money was on John’s hoss! John will probably bring his new red pony to the TAB, so git ready for him to come say “hello the camp” and bum a beer off ya!

Sterling and Kelly did a great job as booshways, handling all the fun things that a big ‘voo throws at ya. It’s always a challenge! For folks who complain about such things, my thought is, “here’s yer clipboard, let’s see how you would do it”. I know I appreciate all the hard work and planning that goes into an event like that, or even a regular weekend ‘voo, so my hat’s off to all of you who have stepped up and given it your best shot. Thanks!

We camped next to Lil’ Griz, and he’s always a riot to be around. 🙂 Jonathan Carlin was on the other side of us and James Bryan camped with him for a few days, good neighbors too – thanks for the wine selection, Jonathan! Slayer and Bobcat weren’t too far away, and brought us some grilled trout one day – delicious!! There was an older couple behind us who had a big gooseneck trailer with a winch and offloaded a cool log cabin for the week! Beautiful painted tipi behind us too, belonging to Russ and Marnie from Wisconsin, I think. Russ played a mean guitar, and Marnie plays harmonica, so they added to the ambiance over near Bugs and Willie Glover’s tents for music around the fire. Daing I can’t remember their names, but the two guys who play bagpipes and bodhrans were there, and Steve Sprinkle too, and Critter, and several other folks. Cyrus showed up later in the week with his Jew’s harps and string bass. CRS, can’t remember the long-haired bushy-bearded fellow who has the website with pics on it (something-Bear) but he was there too, and played at Miss Andrea and Turtle Woman’s “Blushing Ankle” saloon/tavern a couple of nights. John and Cuz and I had a good time there too, and John developed a new fondness for grapes! 🙂 Serving wenches were very talented, and so were the strapping young serving boys at the ladies’ social held there! I hear lots of quarters were won and lost at the nightly card games there too.

I took my Malamute, Shadow, and he had a fun time going “wooo-woooo” and getting folks to pet him and tell him he was purty. Crafty lil’ devil made an escape from his crate one night when I didn’t quite get the bolt latch all the way closed after a midnight pee trip, and sneaked out of the tent to do a little “tipi-creeping'” of his own at about 3am. One of the folks he surprised was No-Nose’s wife Teresa, who had stepped out of the tent to answer the call of nature, and she looked up from a squat to find herself eye-to-eye with what she thought was a wolf at first, till she saw his collar! She found out she could cut it off in mid-stream! His next visit was over to the other traders who had a full-blood female wolf (half timber, half red wolf) named Baby, who had been flirting with Shadow the day before. Turns out she only wanted to play and wasn’t in the mood, but the racket they made woke up her owner twice. So the second time he caught Shadow but didn’t know exactly where I was camped, so he took him out to the gate where there were some trailers for trash and the water buffalo, figuring that trailer’s safety chain would hold his big ass till morning. Naturally I had a heart attack when we woke up a little after sunup and Cuz said “Where’s Shadow??” and his crate was empty!! The last time he went on walkabout at my house, he was gone 4 days and I found him 5 miles as the crow flies from the house! Luckily then too, some folks had tied him up – he’ll git shot for a wolf if a rancher catches him on their place. So as I dashed out to find Shadow, some neighbors said they had seen him at the gate and saved me time in the search. Found him wet but warm, thanks to his thick waterproof fur, and glad to see me. But he did git a serious lecture about his escapades. So we came home and found out the story about his new almost-girlfriend from her owner on the way, and I thanked him profusely for containing my rascal and saving him from causing any more trouble.

John’s dog Dakota went too, and she had a fine time fetching the rubber foot squeaky toy and badgering everyone but us into playing tug-of-war with her! Shadow and Dakota get along and he got to meet lots of dogs, but I think his favorites were Jan’s little Jack-Rat terrorist named Mouse and Irish Kat’s little 6-month old Lhassa named Princess. They were gutsy little pups who made friends with the big dog pretty fast.

OK, now for the tent fire stories, compiled from eyewitnesses.
1. First one happened not far from our tent just after folks had shut down the music and gone to bed. There was a Cajun guy named Johnny from Lafayette, thick Cajun accent, good cook by all accounts, and had some good homemade hooch that was about 140 proof and would shoot a blue flame 4 feet high when he spit a mouthful into the fire, and he had a great sense of humor too – this was his first Rendezvous and I hope it won’t be his last, despite what happened. I heard all this after the fact, so correct me if I’m wrong, but apparently Cajun Johnny had one of those Coleman gas cylinders with a heater on it in his tent, and was changing out the cylinder. They say if you get them cross-threaded, it can break off a little needle thingy in the valve, and apparently that is what happened, and when he turned the heater on again, gas was spewing out and it caught his tent on fire. Cajun Johnny ran out and called for help and folks came running, but his tent was on the ground in less than 60 seconds. So they helped him pack what was left of his gear and got him on his way to a motel for the night.

2. About 30 minutes after the first fire, folks were taking care of Bugs who was a close neighbor there, because he was having a pain in his chest. Then they noticed that Bugs’ and Linda’s tent was glowing pretty red, and daing if it wasn’t on fire too, on the back side!! So folks came a-running again with fire extinguishers and water and put it out. Had some trouble doing it, flames from the gas were shooting way up above the roof. Somehow, Cuz and John and I slept through it all. With the tents being so close together over there, it is a wonder more tents did not catch from the two that burned. So what happened with Bug’s is, either when he and Linda jumped up to help Cajun Johnny, or later when their dogs were in the tent, somehow a candle or candle lantern got knocked over onto a pillow on top of the big propane tank they had in there for the heater and Coleman cookstove, and it caught the pillow on fire and burned through the hose on the propane tank. So that fire got a little propane help too, and burned up the back wall of Bugs tent. He rushed into the burning wall tent, with help from others, to rescue his dogs and his 3 guitars, which were fine. In the process he and another guy inhaled a good bit of smoke, and Bug’s chest was still hurting, so the medics gave oxygen to the other guy, and sent Bugs to the hospital to get checked out and to treat the minor burns on his hand. He was released the next day and is fine, other than a light minor burn on two fingers and a little singed beard hair. They lost a few things, some hanging clothes, but their buckskin shirt and dress and Whitney blanket survived. Lil Griz even fixed up Bug’s hat for him.

3. AS IF that weren’t enough, the next day about mid-afternoon, folks hollered “Fire” again and came a-runnin’ to the other end of camp where George Wilburn’s tipi was on fire. According to George, he was cooking a pot of beans for supper on the fire out in front of the tipi, and had just put some link sausage into the beans. He had set a pan of bread dough to rise near the fire, and was watching it as he went across the road to speak to a neighbor for a minute. Wasn’t gone but a minute, and kept looking back at his fire. The wind was blowing pretty hard from his fire toward the tipi, and next time he looked, a spark had jumped out of the pit and across the log ring and had caught the dry grass and was headed for the door of the tipi! Before he could run across the road (20 feet) and grab the pan of dishwater by the fire it had caught the canvas at the base of the door and tipis being the good chimneys that they are, it went right up the canvas and burned it to the ground. George and his wife lost a lot of gear, but no one was hurt. Good thing the wind wasn’t blowing from the other direction too, because his daughter was in the tent on the other side of the fire changing the grandbaby’s diaper and there is no back door to that tent. George was devastated, he has been Rendezvous-ing for 30 years or so, and knows fire safety and is very careful with it, but it just shows how fast things can go south on ya. He had made that tipi himself, and he and his wife had just harvested the poles and trimmed and sanded them and oiled them. Most of the poles can be re-used, but a few were too charred. The tipi canvas was a total loss.

So camp had an emergency fire safety meeting later that afternoon, bringing certified EMS medics in attendance to the front so folks could see who their medic-neighbors were and know who to call, and having the folks who had a fire extinguisher in camp to raise their hand and keep it up so folks could see who their neighbors were again and know where to turn in case of another fire. They had fire patrols out at night after that, if your fire was not out and banked with dirt, they put it out and you got a lecture. I don’t think they had to give many lectures, as folks were pretty paranoid and careful after that. Found out you need an A-B-C fire extinguisher, not a B-C one. B-C is for electrical and chemical fires, The “A” in A-B-C is for wood, paper, canvas, basically anything that will make an Ash. So the A-B-C kind is the one to get. I think I’m going to make a canvas cover for Cuz’s and put a flame symbol or the word Fire on it and keep it out by the fire instead of under the canvas by the coolers or in the tent. That way anyone who needs it can come get it, and find it easily. One real nice thing, there was a guy at the ‘voo who refills fire extinguishers for a living, and he refilled anyone’s fire extinguisher for free in the parking lot, who had used it up on fighting the fires. Great fellow, real nice thing to do.

Funny thing is, as I was driving home from the ‘voo there was someone on the radio talking about fire danger and how fast a grass fire can move. He said it can burn along at 4 miles an hour. Now that may not sound too fast, but if you do the math, that is one mile of country in 15 minutes, so…(5280 feet divided by 15 minutes is 352 feet per minute – yikes!) that means a grass fire fueled by a high wind and dry grass CAN BURN AN AREA THE LENGTH OF A FOOTBALL FIELD IN LESS THAN A MINUTE. LESS. THAN. A. MINUTE. That’s about SIX FEET PER SECOND. That is why George’s tipi burned – only took a SECOND or two for that fire to jump the 8 feet or so to the canvas, even with him carefully watching and only 20 feet away. FIRE IS OUR FRIEND BUT IT IS A DANGEROUS BEDFELLOW…

At any rate, like I said, we had a great time otherwise. Enjoyed visiting with old friends and met a lot of new folks, including a trader named Lisa from Arkansas, the “Gypsy Potter”. She has some great white-glazed pottery dishes and cups made from historical examples of the colonial era, some pretty green-glazed ware too, and she made some cool historically accurate pit-fired bowls and pipes from the Moundbuilder culture that were fine too. One Cherokee pipe had a squirrel on it, and another was a beaver (pipestem was his tail), and there was a frog with a rattle in his head too, and a stylized deer. Had some fun playing with clay with her, picked her brains for pit-firing advice, and look forward to seeing her at future events, now that she is doing this full-time. Had fun visiting with other traders that I knew, and seeing what wares they had.

The buffalo skinning demo on Sunday went well, provided meat for the meat-cooking contest which was served at the camp feed on Tuesday or Wednesday. Other parts were sold at auction to pay for the price of the buffalo. I scored some buffalo fat for tallow, and the pericardium (heart sack) to be dried and used for wrapping horsehair danglies under quills, and wrapping the red wool “firecracker”-looking trim at the top of ermine and horsehair danglies. Scored the buff’s…er…”manhood” (pizzle) for John to make a walking cane out of, while Paul Jones got two new “ball bags” out of the deal. 🙂 I got to eat some fresh raw buffalo liver and fresh raw kidney, and it wasn’t bad! Trust me, I HATE liver in any form, and if I say it wasn’t bad, it wasn’t bad!! One fellow was collecting various innards to make haggis (liver, kidneys, lungs, second stomach to cook in, etc.). He served the haggis at the camp feed, cooked with barley I think, and it was GOOD too! I know you don’t believe me, but that’s ok, your squeamishness means there will be more haggis for me next time!LOL There were a couple of young boys there watching the buffalo skinning, and someone suggested that the boys get a knife and cut off a piece of buffalo meat so they could tell their grandkids about it. So Bill Vannoy helped them pick out a good spot and showed them where to cut, and each boy “made meat” to take home to his mama to cook. Great experience for them.

Oh well, that’s enough running on for one day. If you weren’t there, you missed a good time! Better make up for it by coming to the SW in 2009, that Jan Kitlinger is booshwaying, located just north of Austin TX – here’s the flyer:
http://www.woodenhawk.com/SWRR/
Flyer2009SWRR/tabid/102/Default.aspx

Contributed by Patsy “Magpie” Harper

March 6, 1836

Ballad of the Alamo

In the southern part of Texas, in the town of San Antone
There’s a fortress all in ruins, that the weeds have overgrown
You may look in vain for crosses andÊ you’ll never see a one
But sometimes between the setting and the rising of the sun
You can hear a ghostly bugle, as the men go marchin’ by
You can hear them as they answer to the roll call in the sky

Colonel Travis, Davy Crocket, and a hundred eighty more
Captain Dickinson, Jim Bowie, present and accounted for

Back in eighteen thirty-six, Houston said to Travis
Get some volunteers and go, fortify the Alamo
Well, the men came from Texas and from ol’ Tennessee
And they joined up with Travis, just to fight for the right to be free
Indian scouts with squirrel guns, men with muzzle loaders
Stood together heel and toe, to defend the Alamo

You may ne’er see your loved ones, Travis told them that day
Those who want to can leave now, those who’ll fight to the death, let ’em stay

In the sand he drew a line, with his army saber
Out of a hundred and eighty-five, not a soul to cross the line
With his banners a dancin’, in the dawn’s golden light
Santa Anna came prancin’, on a horse that was black as the night
Sent an officer to tell Travis to surrender
Travis answered with a shell, and a rousin’ rebel yell

Santa Anna turned scarlet, play Deguello, he roared
I will show them no quarter, everyone will be put to the sword

One hundred and eighty-five holdin’ back five thousand
Five days, six days, eight days, ten Travis held and held again
Then he sent for replacements for his wounded and lame
But the troops that were comin’, never came, never came, never came

Twice he charged and blew recall, on the fatal third time
Santa Anna breached the wall, and he killed them one and all
Now the bugles are silent, and there’s rust on each sword
And the small band of soldiers, lie asleep in the arms of the Lord

In the southern part of Texas, near the town of San Antone
Like a statue on his pinto, rides a cowboy all alone
And he sees the cattle grazin’, where a century before
Santa Anna’s guns were blazin’, and the cannon used to roar
And his eyes turn sorta misty as his heart begins to glow
And he takes his hat off slowly…to the men of Alamo

To the thirteen days of glory…at the siege of Alamo

Now the bugles are silent, and there’s rust on each sword
And the small band of soldiers, lie asleep in the arms of the Lord
Lie asleep…in the arms…of the Lord

By Marty Robbins

Around 5:00 A.M. on Sunday, March 6, [Santa Anna] hurled his columns at the battered walls from four directions. Texan gunners stood by their artillery. As about 1,800 assault troops advanced into range, canister ripped through their ranks. Staggered by the concentrated cannon and rifle fire, the Mexican soldiers halted, reformed, and drove forward. Soon they were past the defensive perimeter. Travis, among the first to die, fell on the north bastion. Abandoning the walls, defenders withdrew to the dim rooms of the Long Barracks. There some of the bloodiest hand-to-hand fighting occurred. Bowie, too ravaged by illness to rise from his bed, found no pity. The chapel fell last. By dawn the Centralists had carried the works. The assault had lasted no more than ninety minutes. As many as seven defenders survived the battle, but Santa Anna ordered their summary execution. Many historians count Crockett as a member of that hapless contingent, an assertion that still provokes debate in some circles. By eight o’clock every Alamo fighting man lay dead. Currently, 189 defenders appear on the official list, but ongoing research may increase the final tally to as many as 257.

From – http://www.tshaonline.org/handbook/online/articles/AA/qea2.html

Pack-In Report

This is going out to a good many of my friends, as an example of what I have been up to lately. It’s long (they don’t call me “Magpie” for nothin’! LOL) so get some coffee and kick back for a bit while you read it. And you’ve always got a delete button if you aren’t interested. 🙂 if nothing else, reading it will make you appreciate a real bed, central heat and air, and hot and cold running water. 🙂

I started going to Rendezvous in 2003, renactments of mountain man/buckskinner/trapper Fur Trade Era life, 1795 or so up to 1840 time period in the northern Rockies. Everything in camp has to look like it was made on or before 1840, clothing, camp gear, dress, weapons, etc. Way fun to participate in. Then about 2-1/2 years ago, I got into the Women of the Fur Trade (WFT) group, and about the same time my boyfriend Cuz (Phil Trumble) and I got together. Phil is a member of AMM (American Mountain Men), and the AMM/WFT gatherings are a little more strict and strenuous that a regular Rendezvous, as to accuracy and documentation of gear and such. All of it is great fun to me.

Here’s a website on the AMM: http://www.xmission.com/~drudy/amm.html

The following is an example of what goes on at an AMM weekend camp.
Cuz and I got back yesterday from a weekend with the Red River Brigade of the AMM up in northeast Texas near Linden. Had a great time of course. Cuz made us a travois to drag our stuff in on, just a prototype, to see if it would work – with a few minor refinements, I think it will work out great for us. He laced the platform up with string instead of rawhide to save trouble if it needed to be modified. He made it with the longer side poles nearly parallel, with a square platform of sticks toward the back of it. It had a crossbar in the front to keep it stable. That way one person could step inbetween the poles, like where the horse or dog would go, and pull it along by holding onto the crossbar and pushing that. Or two people could do it by grabbing the long pole or the crossbar, one on either side of it, and pull it along that way. We had all our gear on it, water canteens, bedrolls, dried food, etc., wrapped up in the larger 9×9 diamond fly. My bedroll was in a 7×7 oilcloth tarp, his was in an 8×8 oilcloth tarp, so that gave us enough canvas to construct a Taj Mahal of tents if we had wanted to.

We cut cedar branches and laid them out with the brushy end pointing toward the foot of the bed area, stick end toward the top, then overlapped the next batch of branches over that so that the sticks are covered. Then we gathered a tarp full of dead leaves to put over that, as insulation from the ground cold. My 7×7 tarp went down as the bottom layer of the bed, to keep out the ground damp, then Cuz’s two blankets under us and my two on top, plus his 8×8 over that to keep out the wind and make that air space under it still and easier to keep warm. We used the white 9×9 canvas as a diamond fly. Slight overkill, but last year in the same spot for a week in January, it rained, sleeted, snowed, and was 19 degrees with a stiff wind blowing all night long. You never know with Texas… This year there was frost on the ground Friday morning, 32 degrees Saturday morning, but it warmed up to the 60’s in the daytime. We had some pine trees for a slight windbreak, that helped cut the chill some. Clear skies sure made that abundance of stars a great sight at night. Starlight, with or without only a thumbnail moon, was bright enough to get around camp without a light.

Cuz and I camped with Yip and Blackpowder Jim and shared a cooking fire with them. Jim brought his 18-week old speckled Catahoula/Blue Heeler pup named Dawg (who got the camp nickname of “Camp Dawg” – synonymous with “mooch” – at the last Rendezvous) and Dawg was in charge of dishwashing and the head of the entertainment committee. Dawg was also in charge of early wake-up calls with a cold nose and wet kiss. 🙂 He’s the only one I’d let get away with that…besides Cuz. 🙂

I fixed venison posole (venison jerky and hominy and dried onions and peppers and other stuff) at our camp Thursday night, Saturday night we had black-eyed peas and sausage, both supplemented with a mess of small wild onions gathered on site. SMELL them ALL as you gather and clean them, and make sure they are all onions and not crow-poison or death camas or some other bulb, could be fatal if you don’t. I fixed hoecakes (hot-water cornbread) in the grease left over from breakfast to go with Friday night’s supper. Breakfast was fried salt jowl with grits and brown sugar, Mexican chocolate in the coffee, all made on the fire of course with pre-1840 gear (copper tin-lined 1-quart pots, one 3-quart copper kettle, small folding-handle hand-forged skillets, tin cups and gourd cups and canteens) and dried food except for the pork. Everybody contributed to the fixin’s, and as usual, we had way more than enough. Lunch was either supper/breakfast leftovers or dried fruit and pecans.

Saturday night Bill “Catahoula” Vannoy, the booshway, cooked up a fine supper for the whole camp (20+ men, plus me and the landowner’s wife Patty) of posole made with the traditional pork and hominy and peppers, a huge iron kettle of black beans and another of pinto beans, and tortillas, with coffee from the two-gallon “bottomless coffeepot” named “Josefina”. Josefina kept the coffee coming night and day for us, all weekend.
Friday Cuz and I went walking around with Ed Cotton, a REAL knowledgeable gentleman regarding native plants of the area. I had asked him to show me some green things to eat at that time of year in that piney woods region since I’m not real familiar with what grows in that area. There was not much green stuff available yet, but Ed did dig up some sassafras root for tea and it was GREAT fresh, much better than the dried stuff that they sell in health food stores. Made two quarts (two boilings) of tea with just a handful of small roots and bark. Smells wonderful and tastes better! Found some paper birch bark for tinder, gathered some blackhaw fruit for the seeds to plant (kinda too dried to be worth eating but might do in a pinch if you were hungry, they were sweet still). Gathered some sumac berries for seed for my new place, I figure the edge of the woods along the power line clearing will be a good place for both. Sumac berries make a good tea, but these had been rained on all winter and most of the flavor would be washed out of them by now.

September/October is the best time to gather them here. Found some wax myrtle seeds too, Ed says they make a good gun lube, leaves on these make a good tea too. Learned that tea from dewberry or blackberry root is good for stopping you up if you have the…um…runs. Learned to identify dogwood in the winter by the little round seed cases left on the ends of the twigs, and to know eastern persimmon by the bark texture. Learned that a dried grapevine stem is an easy way to carry a coal from one campsite to another during the day’s travel, it smolders all day, once you light one end. I used to “smoke” grapevines as a kid, never thought of carrying fire that way though. 🙂 Ed is the nicest fellow, always a pleasure to learn stuff from him.

Saturday afternoon one of the AMM folks who had brought out his horse and mule, taught us how to pack a mule for travel with a packsaddle, panniers, breechings, and breast collar/martingale. Bill Vannoy & others assisted in the class. They also showed us how to tie a single diamond hitch and double diamond hitch.

Basic saddle and panniers looks pretty much like this pic, only this is on a miniature donkey, not a full-sized mule:
Pack saddle itself (sawbuck) looks like this:
Here’s a good page on packing a horse or mule:
Single diamond hitch to tie down the gear:
And double diamond hitch (takes two people, much faster with two folks tying a single diamond too, less walking back and forth around the mule):
You lay your folded diamond fly canvas on top of the folded bedrolls, which are on top of the panniers/pack bags, then tie the diamond hitch to secure all that and keep it together and balanced on the critter, and hopefully not scraped off by branches on the trail.

It is VERY important to keep the panniers of exactly equal weight and keep them centered kinda low on the mule. Hard to carry an unbalanced or top-heavy load and strains the mule. REAL hard to carry that load up a mountain on your OWN back if you sore up the mule! The critter can carry about 20-25% of its own weight in packs. About 125 lb. for the small sorrel mule that this gentleman had, but he said the army said they loaded up to 200 lbs or more on a mule. Musta had big mules. Depends on how far you want that mule to carry that load too, what kind of country (flat plains or steep mountain trails) and on what athletic condition the mule is in. Can’t get up off the couch and set down your beer and run a marathon, mule can’t either. 🙂

Here’s a couple of websites on what the US army expected of its mules in the late 1800’s:
“On our western plains a pack mule can carry 350 pounds without too great fatigue, but in tropical countries [Puerto Rico, Phillippines] it has been found that 200 pounds is load enough”
And in 1937 the recommended weight for pack mules and ponies was down to a 160-lb load.:
I also got to pratice writing with a quill pen, learned how to harden the quill by putting it down in hot sand and letting it cool off, and how to make black ink from oak galls. Boil the galls to make a brown ink, add rusty stuff to make the ink turn black, and add bran to the mix to thicken it.

Sunday after breakfast, we packed up our gear and carried it out and came home, sad to leave such good company, and looking forward to the next “shinin’ time”.

Contributed by Patsy “Magpie” Harper
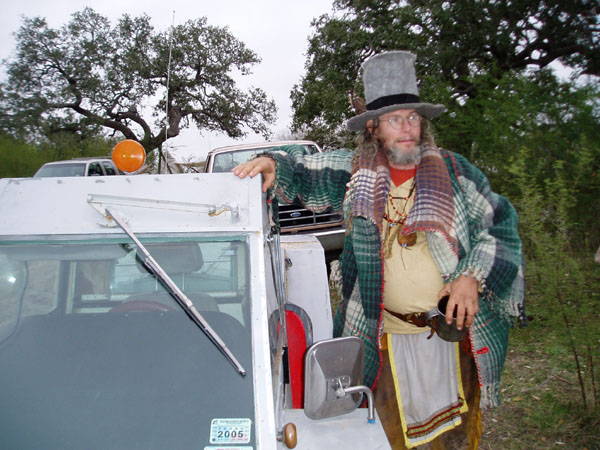
When to not be period correct

One of the great things about the buckskinning hobby (lifestyle?) is everyone can take it as far as they want. There are some folks who love the idea of taking one blanket out into the woods or to an event and just throwing down on the ground. Others really like to bring out their “canvas castles” and set-up a fancy camp that would rival even Captain William Drummond Stewart.

Most events will set the ground rules for what is and isn’t ok beforehand – from primitive pack-ins where one’s accouterments and gear is scrutinized for accuracy to larger public events where pilgrims can walk among veterans in all states of dress.

I try my best to be as historically accurate when attending events, but there are some modern items I alway make sure are on hand – regardless of the time period of the event.

Being a volunteer medic, I always like to make sure I have a few essential items on hand, and I am also very serious about making sure I always have fresh, clean water to drink.

First Aid

No one likes getting hurt and this is my ultra-small list of essentials I make sure are always in my haversack. Feel free to be offended that I bring these out, but please have no shame in asking me if you find yourself needing anything while out on the trail.

Pain meds: Pain meds are good fever reducers as well as their obvious benefits in helping alleviate pain. However there are usually other liquid pain relievers at most events that are probably just as effective. Remember that ibuprofen primarily helps muscle-related pain and acetaminophen not only reduces pain, but also helps with severe itching due to insect bites and poisonous plants (pain receptors are riding on the same nerves that tell us to feel itchy, so it really works), so choose accordingly. I always bring out at least 2 doses of ibuprofen – usually 4 pills.

Allergy meds: I love the spring when everything is blooming and the fall when the weather changes again. Unfortunately these are also my prime allergy times and since I have a habit of throwing my bedroll down on this viney, leafy plant that seems to make my brain try to swell out of my head, I always make sure to pack along at least one Claritin-D.

Anti-diarrheal meds: One of the leading causes of death in the 1800s was diarrhea. Seriously. If you are planning on trying to forage on mystery plants and small, rodent-like animals, make sure that you have some of our modern “miracle” medicine to make sure that you don’t loose a dangerous amount of fluids while out trekking. Pack at least 2 doses of immodium or its generic counterpart.

Roll of medical tape: My theory is that I don’t need to pack along a lot of bandages if I have all of the makings of bandages right there with me. In truth, any clean cloth will do, but I like to have the added protection of completely covering a wound to keep out contaminants and then dealing with it when I get back to civilization. I always bring along a small roll of the waterproof kind.

This isn’t intended to be a primer on wilderness medicine, but the basic rule of thumb is that if you can pack out of the woods in 48 hours that is less time than in takes most infections to set-in from cuts or lacerations – but make sure to wash all out wounds (except serious burns) with clean, fresh water and let dry prior to applying a dressing. Any wound that is serious – that is bleeding that can’t be stopped, loss of consciousness due to trauma, falling from any distance over 6 feet, etc. – should be packed out immediately.

Anyone with known allergies should always bring along their epi pen or inhaler. If you are on regular meds, make sure you bring out those as well. Ten miles away from your car and your cell phone is no place to find out if you really do need those blood pressure meds.

I also really recommend taking a class in wilderness medicine if you are planning on spending any appreciable amount of time in the backcountry. Not only is it good for your own safety and the safety of your crew, but it’s great peace of mind for the family members who worry about you when you are in the woods.

Water purification

While many of us love the romantic ideal of wandering through the woods and drinking from crystal clear streams and springs, the reality is that its just not a good idea.

I have heard two schools of thought on this. One is that the 20th century has gotten us so used to ultra-purified foods and water that we are unable to deal with bacteria and viruses that has really been around for as long as we have – probably longer. The basic idea is that since we are more or less out of the habit of consuming these little nasties, we are basically getting sick with something that we would have already had to deal with earlier in life, in a more primitive time.

The second school of thought is that we are polluting our environment so much more – toxins, heavy metals, cow feces – that there simply isn’t many spots on earth that aren’t contaminated.

To be honest, I think it’s probably a little of both, which is why we have to make sure we can decontaminate all water we use in a wilderness setting.

Filtering water takes the nasties out of the water, while purification kills organisms that are in the water. The important thing to remember is that while purification will work against living nasties – bacteria, viruses, and other baddies – anything that is not alive to begin with – heavy metals, fertilizers, etc. – can’t be rendered inert by the purification process. These elements must be filtered out.

It’s for this reason that I recommend two steps to make water safe in the outdoors – filtering and purification – whether chemical (with iodine tablets or chlorine-based chemicals) or by boiling – which is much easier on the authenticity of an event.

Some contaminants – like giardia for instance – are even somewhat resistant to water purification chemicals and must really be boiled to ensure they are rendered inert.

There are all sorts of smaller water filters at places like REI and in about a million locations on the web. I recommend going into a backpacking store and talking to someone there to get an idea about what to buy. You’ll also want to have someone who can demonstrate how to use the filter as they can be a little tricky when you first start playing with one. Make them do this before you even buy the filter. You certainly don’t want to learn how to use it when your canteen is empty and you are two days walk from the last water source.

The good news is that many backpacking filters are small enough to fit into a small leather or canvas pouch and throw into your haversack. If you are worried about ruining the ambiance of an event, just grab the crew bucket or a tin pot, shamefully walk over to your water source, and then do the filtering away from the rest of the group.

Your crew may not like seeing the plastic device, but you only need to get sick one time to appreciate how great they are. Just remember that filtering is the first step and make sure to boil the water back at camp. Once boiled, you can let the water cool and then add it to your canteen or water container. Some vigorous shaking of the container (make sure the lid is on) helps get rid of the flat taste of boiled water. I think the end result tastes better than using tablets and it’s also much more safer.

Be careful! 🙂

– Many Rifles

To Tan A Hide: An approach to tanning an animal pelt in a Pre. 1900 fashion.

To Tan A Hide:
An approach to tanning an animal pelt in a Pre. 1900 fashion.
By: Taylor Tomlin

Acknowledgements:

I have been tanning hides for about ten years now, using all the various methods available both modern and pre modern, and have gained a volume of knowledge in the skill through my own experiences and research. However, I owe great thanks to a number of people in the trade for there expertise and contributions to my working knowledge of the profession. I would like to thank the following people: Wes “Wild Bill” Housler Sr., Wes has been a long time friend and teacher and has taught me a great deal about the brain tanning trade. Ken Wilson , long time friend and I owe him a great thanks for making me brain tan my first hide, correctly, and coaching me through the process. Tom “Varmit” Arnold, Tom is a long time friend and never hesitates to point out my mistakes and provide advice on how to improve. Glenn “Timberline” Quick, long time friend and a great tanning critic. Rodney Nance, long time friend and Rodney via numerous conversations on the topic has helped to build my tanning knowledge. Mark Secord, Mark is a long time friend and former employee in the taxidermy field, I obtained a great deal of skill and training from him in the modern tanning methods and in hide preparation. And last my parents for continually supporting me during my early tanning years no matter how much, hair, salt, and remains I left in the yard.

Foreword:

There are many different ways to tan a hide today, whether using an old world or modern method. Animal hide tanning has been a human skill from the time we learned to walk upright and there are a variety of methods to do so. Although, as I’m sure many have discovered on their own, tanning a hide is about the most complex and difficult task to undertake. Hide tanning can be a long, drawn out process whether it is done right or wrong . Thus, after acquiring a capable amount of knowledge and the regular requests for advice on the subject, I thought that I would sit down and record the methods I know for those that know me to have a hard copy of and for those that have not had the honor of meeting me 😉 something to look to for advice. Now I am not claiming to know it all, but I feel that I have a fair amount of knowledge and opinion on the subject to provide those interested with some help. Enjoy and Good Luck!

Acquiring Your Hides:

There are numerous ways of obtaining skins for the tanning process. Many of the tanners I know save the skins of the animals that they take in the hunt each year to be later processed into leather. Friends and other persons that you know of that hunt and do not plan on tanning the hide themselves can be a good source for hides. Meat processing plants and local butcher and game processors are a great source for hides, since there is virtually no longer a market they are usually more than willing to give them to you so that they do not have to dispose of them. There are a number of tanneries that deal in green hides, and sometimes this is a good source for those that cannot partake in the hide preparation process, because usually these hides are fleshed and have been cured and are ready to tan. Taxidermists can be a good source of hides, they usually have either whole or parts of hides that they have to dispose of, and some can or will provide a pre pared hide but usually at a price. Some states have public roadside disposal sites for hunters to off load their hides and if you are in one of these states and are in range of a disposal site I would suggest raiding them for the better non butchered or already decomposing hides.

The Pre Tanning Process:

Once you have received some hides you must them begin the pre tan process or your hide will inevitably rot. If you do not plan on tanning your hide right away then store it in the freezer in a fairly air tight bag or container to prevent damage. A hide will stay good for less than one day if left out, and for roughly three days if kept in an ice chest with ice, but after that harmful bacteria will begin to set in an break the hide down. If you plan on tanning your hide without the hair on then you do not need to worry if the hair begins to slip early or is damaged while in the ice chest or freezer, as it takes much less time for the hair follicles to break down than the skin itself.

Fleshing:

Fleshing is the first step in the pre tan process. There are a variety of ways to “buck” a hide but they all take about the same amount of effort and time and all end with the same effect. Fleshing is the removal of the fat and meat that is still on the hide after it has been taken of the animal. There are ways to cut down on the amount of remnant left on the hide in the skinning process. Either cut off as much of the remnant while skinning, or let the skinner know that you plan on tanning the hide. The latter is even more important because it will determine the amount of holes that will be in your hide, as skinning an animal with the intent to tan its hide takes a little more time and effort to prevent cutting excessive holes.

Next you will need to determine the method of fleshing based on the materials available. Beams have been an effective fleshing device for myself and others. A beam can be created in a variety of ways, a round log set above the ground at a 45 degree angle is very effective. If you decide to use a log try to use one with a small diameter so that you can place a piece of PVC pipe over the end, the log can be used without the PVC but I have found it far more effective to place about piece of PVC roughly three feet in length over the end of the log as it will allow you a harder working surface and prevent tearing holes in your hide due to the wood becoming soft while using it and pitting out. Beams can also be a 2×4 up to a 2×12 piece of lumber, if you choose to use cut lumber for your beam cut the end of the beam (the end that you will be working on) to a point, round the edges and sand it thoroughly so that your hide doesn’t get caught on splinters or your hands either. Another effective structure is a frame, frames can be built as large or small as needed and out of any sturdy material. A frame is a square or rectangular structure composed of four pieces of material so that the hide can be stretched out to flesh. Once you have built your frame you will either need to string your hide up by using rope or cord, the medium sizes of nylon cord have worked the best for myself. Lacing the hide will require you to cut holes roughly six inches apart all the way around the hide and then lacing the rope or cord threw the hide and around the frame until the hide is stretched taut, I would suggest screwing eye bolts into the inside of the frame to make the lacing process easier, or you can screw in eye bolts and instead of rope or cord use s-hooks to stretch the hide around the frame. Lastly, the hide can be stretched and staked out on the ground.

Now that you have your fleshing structure in place you will need to select a tool for removing the remaining flesh. Scraping on a beam will require a blade of some type, a butcher knife with a dull edge, an old draw knife with a dulled edge, or a fleshing knife/tool (which is a specially designed knife just for fleshing and can be easily purchased) can be used for pushing he flesh off of the hide in a forward motion from your body. A caping or paring knife or any knife with a short clip point or rounded point can be used for removing the flesh in a downward, almost shaving, motion going from the hide at the top or end of the beam down towards your person. If you are using a frame will need to use the Sioux style of scraper that can be purchased or made at home. A Sioux style scraper is piece of wood, antler, or metal that is roughly arm length and has a sharp usually square cutting point laced, pegged, nailed, or screwed into the handle at a 45 degree angle. The cutting point can be a piece of sharpened file steel or other high carbon steel, flint, or piece of knife blade. I suggest using a piece of a file because, files are readily available and easy to sharpen. Once you have chosen your cutting point for the Sioux style scraper, grind or work the point from the top down until you have a 45 degree cutting edge and only sharpen the point form the top and never from the bottom. Scrape the flesh side of the hide until all the remaining meat and fat is removed. Some areas of the hide such as the neck and rump may need to be thinned down if they are too thick, with heavier hides such as elk, mule deer, ect… this may need to be done to ensure that the tan set thoroughly in those areas.

De-Hairing:

Once you have removed all of the flesh from the hide you can begin the hair removal process. However, you must flesh the hide before dehairing because damaging bacteria will set in to the meat and fat and spoil the hide. The hair removal process also has a variety of methods, it can be scraped off in the same manner as the flesh or removed by other chemical or natural means. A common method of hair removal is using garden variety lime or potash ( ash from any fire ) in a mixture of ¼ ash or lime to ¾ water in a sealable container, this method can take some time 1-10 days for the hair to begin to slip properly and you must check the hide and solution daily to make sure that it is working correctly and the solution and hide should also be stirred daily. After the hide is removed from the solution it will need to be neutralized in water by letting it soak in a container with clean water and rinsing and repeating this several times, baking soda or borax can be added to the neutralizing solution, to give a greater effect but the hide will still need to be soaked and rinsed in clean water only afterwards. A method sometimes used by the Native Americans was to either stake or place a heavy rock on a hide in a flowing creek or stream and let the running water remove the hair. Another method is to take rope, usually cecil, hemp, or nylon and tie it taut between to trees or posts and work the hair side of the hide over the rope and a fairly quick pace to create friction. Metal cable can also be used in this manner. Other hair removal substances can be purchased via several companies and all require different methods of solution and neutralizing. When or after you have dehaired the hide make sure that you get all of the epidermis off of the hair side of the hide (shiny side) or it will not have the right texture or tan as well. If you are tanning hair on then you don’t need to worry about this.

Curing:

Curing a hide will depend on the tan you intend to use. The hide will need to be reamed out and allowed to drip dry for some time, usually 2-8 hours depending on the size and thickness of the hide being prepared. Once the hide has reached about 30% moisture content you can begin the curing process. There are different ways of determining the moisture content of a hide, there are numerous electronic tools available to measure the content, or it can be done by sight and touch. When the hide is no longer dripping and feels only damp to the touch then it is ready to be cured. If you plan on using a “brain” type tan smoke the hide some over a fire for about thirty minutes, this is not necessary but it can help with the curing and tanning process later on. If you plan on using any other method, or just want to opt out of the smoking, lay the hide out on a plastic surface, tarps work great for this, or the hide can be pinned to a board or places on a commercial or home made hide stretcher. Hide stretchers can be purchased from most major trapping, tanning, and taxidermy suppliers, or they can be made by taking two boards of equal length and width and fixing a hinge of either leather, rope or metal on the top and then pining the hide to the boards and widening them until the hide is properly stretched. Then you should place anther piece of material over the widest area of the two board and fastening it to them so that the stretcher will stay in place. (Using the former mentioned stretcher is only practical when tanning a cased hide, or a hide that has not been split.) Once the hide is in position place non iodized or food grade salt over the hide until it is completely covered. Borax can be added in with the salt to help prevent bacteria and it give a great distaste to any critters that might attempt to indulge itself in your hard work. Non iodized salt can be purchased at most grocery stores in one pound containers, or if more salt is needed you can purchase 20-50 pound sacks of non iodized food grade salt from most agricultural feed stores or food industry providers. The hide will need to sit in a cool dark place to cure, and you will need to check on the hide daily to measure the saturation of the salt, when the salt looks mostly saturated with the water and oils from the skin and if the skin is not yet dried out, remove and dispose of the saturated salt and place a new coating of fresh salt over the hide. This may have to be done in two or more instances. Do not reuse saturated salt as it will not absorb any more water or oils out of the hide and will only cause the unsaturated salt to absorb less from the hide. The hide should be turned over and salted on both sides to insure that the hide will cure thoroughly. Once the hide is completely dried out, nearly rock hard, it is cured. The remaining salt should be removed and disposed of and then the hide can be stored in any dry place until you are ready to tan. The hide can also be re frozen at any point during the process, but you should not do so more than three times as some damage can occur from refreezing. The environment that you live in will determine the amount of time the hide will take to cure. In dry climates it may take as little as one day with very little salt applied, but in humid climates it can take several days and several re salting to completely cure the hide.

Tanning:

There are numerous methods and formulas for tanning hides, you must decide if you want to tan your hide naturally or chemically, and then between using past or modern formulas. The time it takes to tan and the quality and texture of the tan vary with the formulas used. All of the formulas follow the same procedure in application.

Brain Tan:

Brain tanning is becoming a more popular tan among persons that truly want a historically correct tan. And the methods and materials implied are far more available today then they have been for some time. A brain tan is just what the title suggests, using the brains of the animal or the brains of an animal to tan the hide. Every animal has enough brain to tan it’s own hide with the exception of some humans.

The tanning process commonly called “braining” has a few forms of practice. If you used a frame to flesh your hide you can re lace your hide to the frame unless you did not remove it for the curing process. You will need to wash all of the salt ( and borax if used ) out of the hide before tanning and allow the hide to dry back to its former rock hard condition.
Concocting your brain tan formula can be done several ways: the brain can be cooked in a pot of clean water, never allow the water to get so hot that it is unbearable to touch, use your hand or fingers to measure the intensity of the heat by frequently dipping into the pot to check the water temperature, if you cannot comfortably place your hand in the water it is too hot. If the brain is cooked whole, let it cook until it turns a light brown in color and then taken out and smeared into the hide, try to place an equal amount of brains all over the hide (both sides, unless you are tanning hair on and then it you would apply it to just the flesh side) and let it sit for a few minutes, then take the water that you cooked the brain in and begin to paint it onto the hide. With your free hand rub the brains in or you can use the back side of your Sioux scraper or the blunt side of your fleshing tool to work the tan into the hide. Another brain formula is to mash the brains into a pulp and cook into a paste, again not letting the water to become too hot, and the paste and either be painted on or if your cooking container is large enough, you can ball up the hide and place it entirely into the paste. Let the hide sit in the paste for a few minutes and check it often, after 15-30 minutes you will notice that the hide has absorbed a great amount of the solution, the hide should then be removed and reamed out into the cooking container. You should try to save as much of the solution in the hide as possible. The hide should then be taken to your beam or stretched back out on the frame and the solution should be worked into the hide using the methods mentioned previously. You may have to repeat this process several time as it usually take at a minimum of three brainings to completely tan the hide. After each braining and each time you work the solution back out of the hide you should smoke the hide over a fire for a several minutes and allow the hide to dry back out to roughly the 30% moisture stage to insure that the tanned areas of the hide are set. One way of checking the hide to see if it is thoroughly tanned is to hold it up to a light, any areas of the hide that you can see thru are not tanned and should be re brained and worked until you can no longer see thru the hide. Once the hide is thoroughly tanned you can then smoke it to you desired color, all hides should be smoked some because the smoke sets the tan and any un smoked areas will revert back to rawhide when wet. Different woods will provide varying colors, pines and aspen will usually give a yellow or what is commonly thought of as “buckskin” color, hard woods, such as oak, walnut, hickory, pecan, ect… will provide a more brown or beige color, and mesquite will give your hide a clay red color. The longer you smoke your hide the darker it will become. Brains can either be taken from the animal or purchased at your local meat market.

There are some other natural tans that are similar to brain tans as all the brain is doing is setting proteins and glutens into the hide and all of the other tans will need to be smoke also. One is an egg tan using raw eggs without the yolk, although I would suggest putting one yolk into the solution. It takes roughly a dozen eggs to tan a medium size deer hide and the solution is made in the same manner that the brain paste is made. The egg tan will give your hide a different texture instead of a soft cotton like texture you will get a more rubbery texture. Some egg whites can be added to the brains to give you more solution to work with. Another is a soap tan, using a non detergent or natural soap, Ivory soap is an easily found non detergent soap for this type of tan. The soap tan uses the same process as the brain paste, it takes roughly a quarter to half a bar of soap to tan a medium size deer hide the soap should be shaven off the bar into the water to solute better, and you can add soap shavings to any of your natural tans to give you more solution to work with. You can also use a bar of non detergent soap to work out hard spots or wash your leather. You can oil the hide afterwards with neat’s-foot oil, mink oil, or vegetable oil to help set the tan and soften the hide but use the oil moderately because to much oil can cause the hide to rot or it will always be slick and oily. If you decide that brain tanning is just not for you but still want leather with that brain tan look you can take any commercially tanned leather, remove the dye with a dye remover, scrape the epidermis off (the shiny side) and smoke the dog out of it, and it will produce a quasi brain tan look and feel. Or you can purchase the German fish oil tanned hides via the appropriate suppliers (Crazy Crow Trading Co. or Wooden Hawk Trading Co.) and get a naturally tanned hide that resembles brain tan ( if you can stand the smell, which does eventually go away).

Vegetable Tan:

There are some varieties to vegetable tanning but they use substances with high amounts of tannic acid. Some good sources of tannic acid are oak and elm trees as well as any other plant containing high amounts of tannic acid, you can find out about plants in your area by searching the internet or visiting your local plant nursery. Vegetable tan, if done correctly can be a very good tan and is often used for saddle leather and for gun holsters and knife sheaths because of the absence of salt in the tan. To create a vegetable tan solution you will need to acquire the leaves and/or bark of a plant with high amounts of tannic acid, the bark or leaves should then be grinded up into a grain or powder and boiled in water. (You have to wash all the salt from the hide before tanning.) You should boil the substance until the water turns to a dark tea or coffee color, and I would suggest boiling it for a while after it turns color to ensure that you get the most acid out of the substance. You will then need a sealable container to mix you solution in. The formula is about one gallon of boiled substance to four gallons of clean water, so a five gallon bucket with lid will suffice for tanning. The tan will take some time to set usually 5-15 days depending on the thickness of the hide being tanned. You can use the same method as the brain tan to check the hide to make sure that it is tanned, by holding it up to a light and inspecting of areas that the light penetrates. And you can pull the hide out of solution every day or so and work it over a beam or lace it in a frame and work the tan in further, soap can be added to the vegetable tan but not brains or eggs as the acid will kill the proteins. Once the hide is tanned you will need to neutralize the acid or it will eventually cause the hide to deteriorate. You can neutralize the acid with baking soda, by mixing a box of baking soda with about five gallons of water and soaking the hide in the neutralizing solution for thirty minutes to an hour, but not beyond that as you do not want to pull all of the acid out of the hide just the majority of it. The hide should then be soaked and rinsed a few times with clean water. Then let the hide dry to about 30% moisture content and either smoke or oil the hide with the oils mentioned above. I suggest a little of both and again use the oil in moderation.

Alum Tan:

For those of you considering alum tan I greatly advise against it. Alum tan is an effective but unpractical tan that will eventually dry rot you hide. And it is harmful to the skin. So I will skip the alum tan and those of you interested can find information on the internet or in various books.

Modern and Chemical Tans:

There are many modern tans that are actually older tans disguised as a modern chemical tans. Many taxidermy suppliers provide a variety of chemical tans and there are a good number that are enhanced versions of vegetable tans, in fact many of them will have vegetable tan somewhere in the description. These tans come with their own tailored instructions and are usually easy to follow and inexpensive. For those of you considering this I would suggest any of the EZ Tan brands from the Van Dyke’s company which is a branch of Cabela’s. Chrome tans are the most common commercial hide tan but they can only be done practically in a professional tannery and can have some health effects over a long period of time. Many of the modern tans are salt water tans, which means that salt water is part of the solution formula and leather tanned with these solutions are not practical for use in making knife sheaths or gun cases/holsters, because they can eventually damage the metal. Always use a vegetable or natural tan for your weaponry if you can.

Conclusion:

Well that about sums up the hide tanning process. I hope that I have provided and adequate description of the processes and what is required for each. Tanning is hard work and should you should never expect to get quick results so don’t try it unless you are willing to put forth the time and effort necessary. Most of the methods mentioned above can be found in numerous publications in hard copy or on the internet so if you are curious to other methods or just want to do some more research it is there for the taking. These are just my experiences with tanning and how I tan hides with the above formulas, tools, and materials.

Good Luck and Happy Tanning!

Taylor Tomlin